Nail art is simpler than it looks. There are really many easy designs that you can do at home and still be stylish. On this blog, we will be talking about some easy nail art designs, from fun polka dots to a twist on the French manicure. So go ahead and take out your nail polish, and let’s get started.
1. Polka Dot Design:
Nail art is not too difficult. If you’re a complete beginner, polka dot designs can be the perfect start for you. It’s not only easy, but also super cute and stylish. Read the following to know step by step how to create this beautiful polka dot nail art at home.
Step 1: Clean and prepare your nails- To start, wash your hand and nails well. Dry your nails properly. Put a base coat on—this will protect your nails from the color and also lengthen the life of the design.
Step 2: Place the base color- Pick a color of your choice which will be the backdrop for the dots. For example—light pink, peach, or white. Put on two layers, and let it dry.
Step 3: Make the polka dots- Pick another color that must be a contrasting one to the base color and dip it and dot the nail lightly. Flatten out the dots, but not all the way—the beauty of this design lies in that. For a perfect finish, use a dotting tool, but bobby pins or Q-tips are available as an alternative if you don’t have one.
Step 4: Finishing Touch- Finally paint a layer of clear nail polish on top of the design for sealing. It will make your nails shine and the design will also last long. Dry slowly, very softly and don’t hurry.
And it’s done. Polka dot nail art design is not only easy, but also gives a good appearance within a few minutes.
2. Stripe Nail Art:
It is a timeless yet trendy style, depending on the one color you decide to wear. The best thing about this style is that it is relatively easy to accomplish. Let’s see how you can do it.
Step 1: Get your nails ready- First, wash and dry your nails. Apply a base coat to strengthen the color of the natural nail and extend the life of the artwork.
Step 2: Select a color- Two colors that are opposite each other are needed for a stripe painting. The lightest shade usually goes down first because it will be seen as a stripe. Allow it to dry completely.
Step 3: Paint the stripes- To achieve neat and straight stripes, use small pieces of tape. After your base color dries completely, put thin tape in the areas where you want the stripes. Then paint the second color on top of the tape.
Step 4: Removing the tape- Gently remove the tape before the second color gets dried. This will give you a neat and clean stripe. Then let the entire nail dry.
Step 5: Finishing Touch- To avoid the design from becoming untidy and to make it shine, a clear top coat should be applied.
Stripped nail art is not just trendy, but also extremely versatile. If you change the color and the width or slimness of the stripes in case you want, you can create infinitely new designs. Try this easy nail art at home—you’ll notice, your nails look completely professional.
3. Color Block Nail Art Design:
If you prefer a loud, playful, and attention-seeking nail art, then color block nail art is the best option. Here you can achieve a collage effect with several colors which is unique.
Step 1: Choose a Color- You can most certainly use more than one color if you wish, but three colors are a good place to start. Use complementary colors to each other, like coral, pale blue, and white.
Step 2: Paint a Base Color- First, paint your base color on your nails. This is the background of your design. Dry good with two coats.
Step 3: Make the Block- Now, use thin tape and keep a portion of your nails separated. Use another color in every portion. Don’t apply the next color until and unless one color is fully dry 100%, otherwise the colors will blend.
Step 4: Remove the tape and complete- Once all the colors are dry, remove the tape slowly. Apply a top clear coat. This will not only seal your design, but it will also make your nails shiny and smooth.
Block color nail art is also something that you experiment with however you feel like. There is no wrong or right.
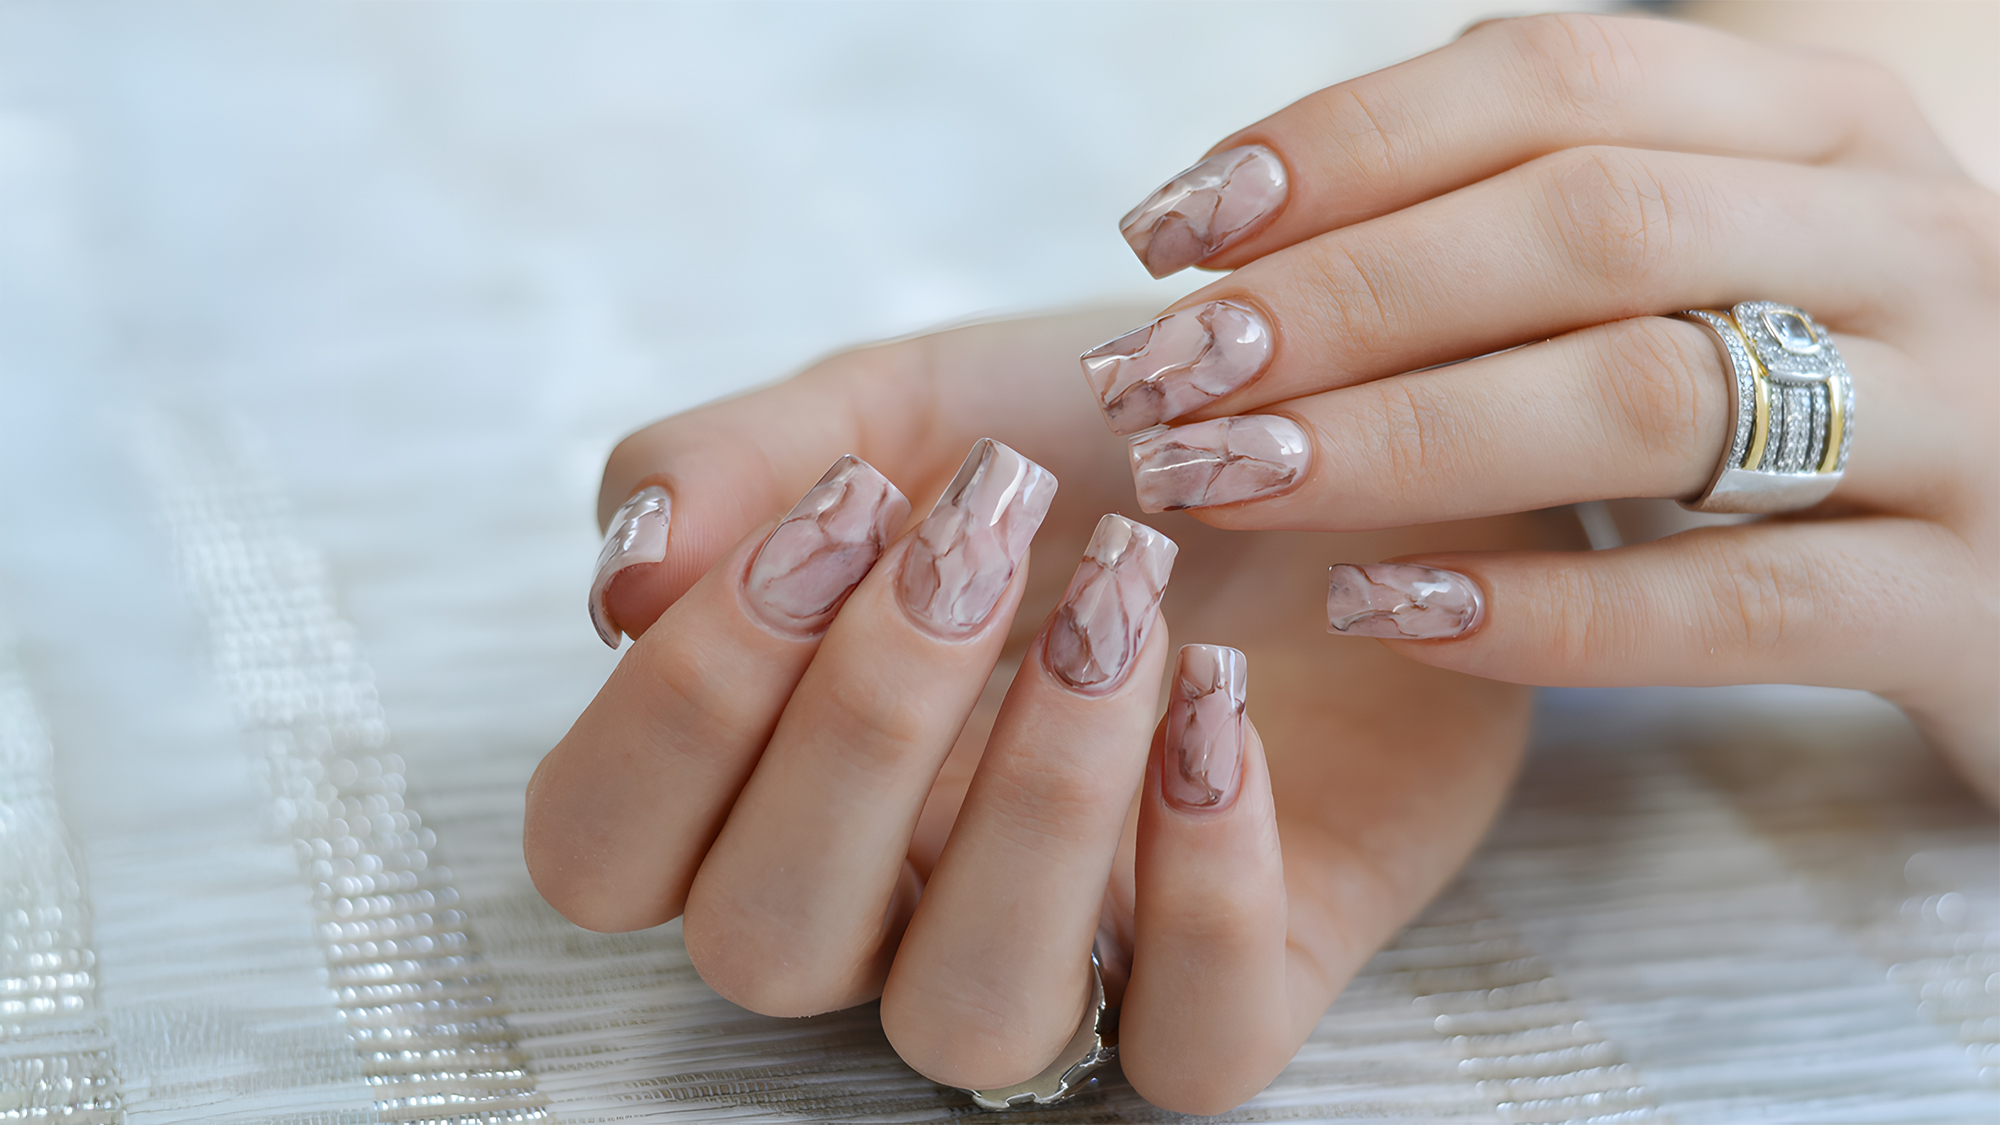
4. Marble Nail Art:
If you want to create something so beautiful and completely one-of-a-kind, marble nail art is something that you have to attempt. Led by the natural whorls of marble stone, the look instantly adds an upscale touch to your manicure. And the best part is that you can easily create this at home without ever visiting a salon.
Step 1: Prep Your Nails- First, paint your base color on your nails. Let this dry, then apply one coat of white or any pastel-colored nail polish, this will be the background on which your marble finish will be placed.
Step 2: Mix Your Marble Colors- Fill a cup with a small quantity of room-temperature water. Add two or three colors of nail polish, one after the other, very carefully. Choose colors that will go well together. Using a toothpick or small tool, mix the colors loosely into a pattern – soft curves, not a linear design.
Step 3: Transfer the Design- Submerge one nail at a time into the water swirled polish. The design will stick to your nail right away. Wipe excess polish off the surface of the water with a Q-tip before lifting your finger. Repeat this process with each of your nails.
Step 4: Seal the Look- Once all your nails are fully dry, seal them with a clear top coat. This is the final step. It seals your design and makes your nails shine like they did at the salon.
Every marble nail will be different. No two will ever be identical. Everyone will have a variation in texture and finishing, and that’s what makes it beautiful. If you want to be bold or subtle and delicate, this simple marble nail art design is all about self-expression and creativity.
5. Glitter Gradient Nail Art:
Want to add some shine to your nails? Glitter gradient nail art is the solution! It’s easy to create at home and ideal for any event.
Step 1: Apply Base Color- Start by applying a base color to your nails. Pick one which will complement the glitter. Let the base color dry completely so that the glitter will stick.
Step 2: Make a Gradient using Glitter- Now take a glitter polish brush and start to paint the glitter from the tip of your nail and blend it down. This will create that great fade effect, with lots of glitter up top and decreasing as you go down.
Step 3: Top it with Top Coat- After you’ve dried out the glitter completely, apply clear top coat. This will prevent the glitter from becoming a mess.
Glitter gradient nail art is loved as its simple, fast, and so sparkly. You may also try other colors like gold, silver, or color glitter. Try it with your favorite colors and enjoy salon-quality sparkly nails at home.
6. Flower Nail Art:
You can do it plain like a daisy or complex like a rose. And the most amazing thing about it is that it will give your nails a spring feel.
Step 1. Prep and clean your nails- First, prepare your nails and apply a clear base coat. This will protect your nails and make the design easier.
Step 2: Apply the base color- Choose a light or pastel color that will complement your flower design. Paint it nicely and let it dry.
Step 3: Start making the flowers- Now for the best part—take a dotting tool or a toothpick and make small dots or petals. You can mix colors, and it will look as if you’re a small flower garden.
Step 4: Place a small dot in the middle of the flower- When the flowers get dry, put another small dot in the middle of each of the flowers in a different color, so that flowers look as if they are alive.
Step 5: Seal with a top coat- Finally, put on a top coat that is clear. This will ensure the design is longer lasting, and your nails will look shiny and adorable.
Flower nail art is pretty straightforward, and you can be imaginative with it. You can create this design within minutes in the comfort of your home, and it will look like a professional has done it. Try it the next time you get your nails done — you’ll definitely adore it!
7. French Manicure:
The French manicure, never out of style and always in style, is just a little different now! This easy nail art concept will completely alter the appearance of your nails — very simple but very elegant.
Step 1: Prep your nails- Wash your nails first, trim and apply a base coat. This will make your nails healthy and protected.
Step 2: Apply a nude base color- Apply a general pink or nude base coat for French manicure. Paint and dry.
Step 3: Paint a white tip- It is a middle guide of French manicure. Paint a thin white line at the nail tip with white color delicately. If you can’t paint a straight line, you can use nail tape assistance.
Step 4: Create some variation- Don’t leave the white tip in solitude, make a statement by adding small stars, hearts or small patches of vibrant color there. The little detail will make your nails look more appealing and personalized.
Step 5: Secure it all with a top coat- Finally, finish off the design with a reflective clear top coat. This will give you a shiny look as well as extend the life of your nails.
You now have a French manicure but with a new and glamorous spin. It is simple, tidy and suitable for any occasion. This is a great idea for classic types who also wish to have a good time.
When you learn about nail art, people usually assume that some special kinds of nail art are possible only from the saloon or any other professional establishment. The real thing is different. You don’t have to be a professional to execute these nail arts. You can design your own once you have practiced them. You can put your own personal touch, your own style in every design. In case it fails to impress the first time, don’t worry. With experimentation and practice, you will be a nail art master. Therefore, don’t delay any further, pick your favorite nail paint today, and start your new hobby of nail art.